
How to setup a WordPress site on a Mac mini running OS X Server Yosemite
I have an internet-hosted Mac mini running OS X Server, and recently decided to figure out how to host websites on it, and in particular, Wordpress websites. After a few struggles and speed bumps, I finally got a site up and running, and wanted to document the process here, pulling together the various bits of information I compiled along the way.
Enabling websites in the Server.app
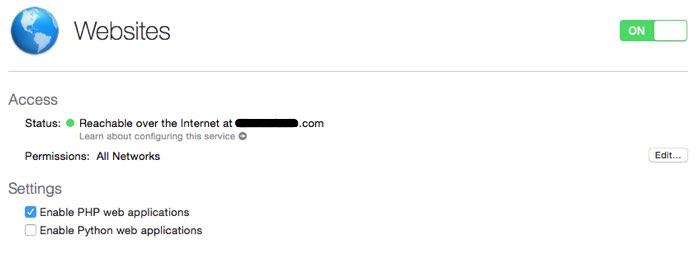
I wanted to setup my website using the stock OS X Server resources, and without using something pre-packaged like MAMP. So the first step was starting Server.app, version 4 for OS X 10.10 Yosemite, connecting to my mini, turning on Websites, and enabling PHP web applications (since WordPress is a PHP application).
Changing the Apache user and group
When you create websites using Server.app, its default location for storing your website files is:
/Library/Server/Web/Data/Sites
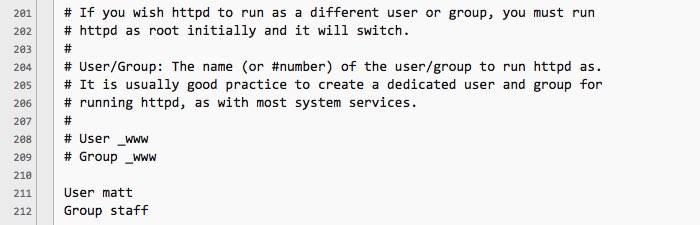
My preference, however, is to store my files in the Sites directory in my home folder: /Users/matt/Sites/ In order for Wordpress’s one-click updating to work, the Apache web server process needs permission to write into the folder containing your website files. The way I chose to accomplish this was to run Apache under my local user’s name and group, instead of the default Apache user/group—_www/_www. Achieving that requires editing the Apache config file, which for OS X Server is located in:
/Library/Server/Web/Config/apache2/httpd_server_app.conf
Only the root user can edit this file, and I know next to nothing about editing files in a Terminal window. In order to edit the file remotely using BBEdit, I needed to be able to login to the machine as root using BBEdit, which I accomplished by adding my SSH key to root’s authorized_keys file.
I already had my SSH key in my local user’s authorized_keys file, and was able to safely get it into root by doing the following (note that it was the only entry in my authorized_keys file):
sudo su - root
cat /Users/matt/.ssh/authorized_keys >> /var/root/.ssh/authorized_keys
Once BBEdit could login as root, I could then edit the Apache configuration file, changing the default user/group (i.e. _www/_www) to that of my local user. (Remember that Apache needs restarting after making this change.)
Creating the new site in Server.app
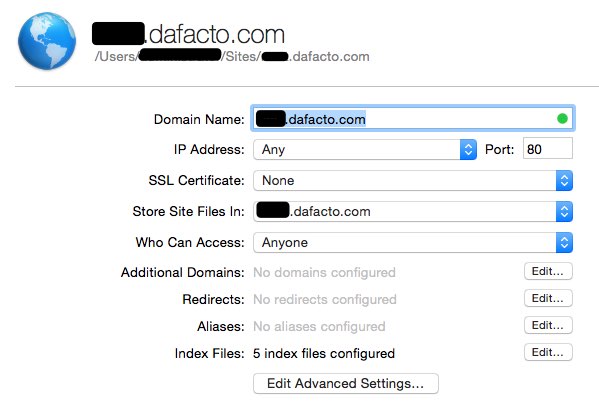
Back in Server.app, I created a new site, leaving all the default settings in place, except for the specification of a non-default location for the website files, as mentioned earlier in this article.
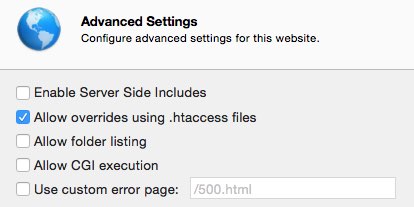
The correct running of Wordpress requires access control via an .htaccess file. By default, OS X Server prefers to control access with its own users & groups settings. You can override this on a per-site basis by clicking “Edit Advanced Settings” and enabling the .htaccess setting.
Installing MySQL
Wordpress requires a MySQL database. The easiest way to install MySQL is running the following command from the Terminal, which downloads and executes a script maintained by the folks at Mac Mini Vault.
bash < (curl -Ls http://git.io/eUx7rg)
The script downloads and installs MySQL, installs a preference pane from which you can start and stop the server, sets up the server’s root password and copies that password for you to a text file on the desktop.
For me, that all worked fine except the part about setting the root password. A note on the script hints that it needs tweaking for Yosemite, and that an update will be available on December 9th. Today’s December 10th, so I guess they’re still working on it.
In any case, I was able to set the MySQL root password by doing the following from the Terminal (inserting my password in the quotes, of course):
cd /usr/local/mysql/bin
./mysqladmin -u root password 'password'
Creating the Wordpress database
Once MySQL was up and running, I used Sequel Pro to connect to my mini securely via SSH, and create the database table I would use for my Wordpress site.
Installing Wordpress 4
The easiest part was installing Wordpress, which just involved going to wordpress.org, downloading Wordpress 4, and unpacking its files in the folder I’d created to contain my website.
After that was done, I renamed wp-config-sample.php to wp-config.php, opened it in BBEdit, and edited the MySQL username and password and the name of the database I’d created for the website.
And with that done, I visited my new website in a browser, and was successfully greeted with the Wordpress installation and setup screen. Yeah!
Restoring from VaultPress
I use VaultPress to maintain a backup of my this blog, which also runs Wordpress. And so while setting up a new Wordpress site on my mini, I thought I’d try out VaultPress’s ability to restore a backed-up Wordpress site to an alternate location, e.g. for times when you might want to migrate your site from one host to another.

In VaultPress, I simply provided the SSH login details to the my mini, and clicked go. The process went absolutely smoothly and within a couple of moments I was looking at a pristine copy of my blog running on my Mac mini.
Performance of a Mac mini vs DreamPress
My Mac mini is a late 2012 Server model, non-SSD disks, 8GB of memory, and a 2.3GHz Intel Core i7 processor. My blog is hosted in a “DreamPress” installation at DreamHost, which involves a pair of specially-tuned VPSs (virtual private servers), one for the Wordpress installation and one for the database server. I couldn’t find memory and processor specifications for the DreamPress product (they only mention auto-scaling resources), and so a direct comparison to the Mac mini’s resources wasn’t possible.
In order to get a sense of the relative performance, I just did some clicking around in the Wordpress Dashboard, and timed how long it took different screens to load. (Since the public site is heavily cached, being logged into the Dashboard is necessary to assess performance.)
In almost all cases, the screens served by DreamPress loaded about twice as fast as those served by the Mac mini. Quite unscientific, but an interesting data point nonetheless. (On the other hand, the pages served by the mini seem about five times, or more, faster than those served by Dreamhost’s cheaper shared hosting.)
Update 2016-01-21
Since writing this article, I've moved my WordPress hosting to DigitalOcean. Here's an article explaining why and how.
Enjoy this article? — You can find similar content via the category and tag links below.
Categories — Technology
Tags — WordPress
Questions or comments? — Feel free to email me using the contact form below, or reach out on Twitter.